Fruitbowl Size Guide
Fruit bowl sizes are as varied as their 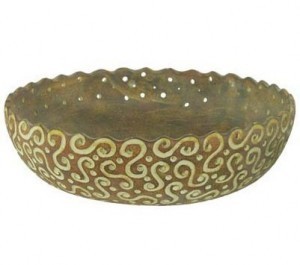 designs. Some are embossed while others are antique, metal, brass or carved metal.
Various Fruit Bowl Dimensions and Shapes
The diversity in size and shape is apparent with these samples from Jasmine Handicraft bowls and fruit dishes. Their 8" decorative fruit bowl is made of brass (polished). It is tan with auburn brown and comes with patterned linings.
The 16.5" embossed dish uses floral patterns for its design. The antique fruit bowl is 12" in diameter and has a lavender look with figurative ornaments. The 9.5" brass metal fruit bowl has floral patterns on the center and border.
Other Fruit Bowl Sizes
The round fruit bowl is 9" and comes with curved dotted lines, floral designs and is embossed. Their 11” embossed fruit bowl is decorated with fruit bowls on the center and outer surface. Their perforated dish comes in two sizes, 7" and 10", both bedecked with leaves. The dish lady is 10" and made of brass.
How to Make Slurry Fruit Bowls
To make a paper slurry bowl, you’ll need the following.
Required Tools and Materials
Newspaper
Construction paper
Blender
Colander
Hot water
Mold (bowl shaped)
Bowl
Wet paper towels
Dry paper towels
Paint, paper cutouts, trimmings (optional)
Paintbrush
Sealer
Note: the fruit bowl size will determine the amount of paper you need. Also make sure the mold bowl is of the appropriate size.
Instructions
Step 1
Cut the newspapers into two inch wide shapes. Fill the blender halfway with these cutouts. Cut construction paper into 2 inch shapes. Fill the upper half of the blender with it. The color of the construction paper will be the color of the bowl. Pour hot water in the blender. Allow it to sit for five minutes.
Step 2
Once the paper softens, mix it with the water until smooth paper pulp is formed. Pour this in a colander. Remove the excess water.
Step 3
Put wet paper towels in the bowl. Ensure the edge is covered by an inch. Pour the slurry in another bowl. The containers have to be the dimensions you want the fruit bowl size to be.
Step 4
Take a handful of the slurry. Press it against the bottom and sides. Add water if needed to make spreading easier. Even the layers until the edges are half an inch thick.
Step 5
Blot the bowl’s insides with dry paper towels. Let it dry overnight. Use the paper towels to take out the paper bowl. Place it upside down on the mold bowl. This will allow the bowl to dry. After it dries, you can paint it and add other designs. After decorating the bowl, apply sealer to it using a paintbrush. When it’s dry, you can add the fruits.
The fruit bowl has practical uses but you can also use it for decorations. As stated earlier, there are many fruit bowl sizes and variants to choose from. A well designed fruit bowl can be the highlight on any dining table.
