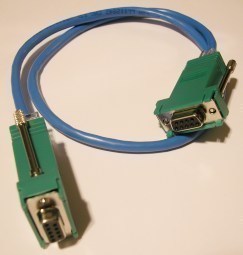
The dimensions of DB 9 cables and connectors are quite diverse. Some cables are only a foot long. But others are three feet or longer. The colors also differ depending on the manufacturer’s style and design.
What is a DB 9 connector?
The DB 9 was formerly known as the DE-9. It is a device used for linking analog 9-pin plugs. The plugs the connector is used for belongs to the D-Subminiature connector group. This is the Sub-D or D-Sub.
The DB 9 connector is utilized with serial connections. This permits for the asynchronous relaying of data. The transmission is as per the RS-232 (RS-232C) standards.
DB9 F/F Cables
The dimensions of DB 9 cables are also the ones used for DB 9 F/F cables. This cable will let you change the DB 9 M/M cable to a DB 9 M/F cable. This will provide you with greater flexibility.
If you are going to buy a pair, ensure that it is totally shielded. This will keep away any EMI/RFI interruptions. Strain relief will be provided for if the cable is fully molded. Make sure that the lines are wired straight. Connector thumbscrews will also be nice.
Wiring DB 9 Connectors
Required Tools and Materials
Wire stripping tool
Soldering iron and solder
6 ft long data cable w/ nine 24 AWG wires
2 DB 9 connector covers
DB 9 pin female connector
DB 9 pin male connector
Take off a couple of inches from the data cable’s plastic sleeve. Using the wire stripping tool, take out a cm from each of the 9
wires.
Step 2
Turn on the soldering iron. Let five minutes pass. After five minutes, solder all of the nine wires to a pin on the DB 9 (male). Take note of the number on the pins’ side. This is at the rear of the male DB 9. Note also the matching wire color for the pin.
Step 3
Solder the wires’ ends on the DB 9 female connector pin. Make sure the solder on the pins do not make contact with the steel chassis or any of the other pins.
Step 4
Remove the screws on the cover of the connector. Position the cover over the connector. Secure the cover screws.
The importance of the dimensions of DB 9 cables cannot be overstressed. Once you have the right cable, it will be easier to set it up. Just make sure to follow all the instructions that come with your purchase.
