Ceiling Lamp Dimensions
The ceiling lamps of today are available in differ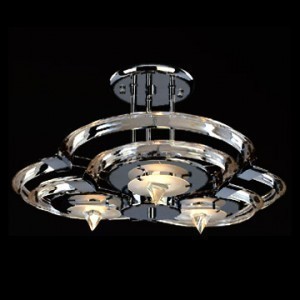 ent sizes and shapes. The following demonstrates some of the different dimensions available today.
Ceiling Lamp Dimensions
The Pallucco Glow ceiling lamp is 210 mm high, 220 mm wide and 220 mm deep. The lamp comes in white, red or black (lacquered semi-gloss metal) or burnished brass. The ceiling lamp requires a 60W G9 halogen bulb.
The Kundalini Pixel Wall & Ceiling Lamp is 510 mm high, 420 mm wide and 100 mm deep. The finish is varnished metal and needs 3 x 12W E14 fluorescent bulbs.
The Kundalini Wall & Ceiling Lamp is 110 mm high, 420 mm deep and 140 mm wide. The shape is similar to an inflated balloon. The ceiling lamp has a triplex opal glass diffuser and fastened on a coated spun base. The bulb required is 1 x 60W G9 clear halogen bulb.
The ceiling lamp dimensions for the Kundalini Abyss is 950 mm (height; max) x 240 mm (diameter). The lamp is fitted with flexible arms (set in injection moulded polycarbonate). The illumination is courtesy of a LED strip with a Plexiglas sphere. It comes in either chrome or opal. It needs 1 x 10W LED strip bulb and one 15W E27 fluorescent spot.
Installing a Ceiling Lamp
Step 1
You’ll need a screwdriver and neon voltage tester for this task. Unfasten the screws on the ceiling fixture. Bring it down and take off the screws / nuts from the crossbar to the electrical box. Disconnect the wires.
Step 2
Turn on the main power. Use a non-contact tester on the colored wire emanating from the ceiling (this step is necessary regardless of the ceiling lamp dimensions). Use the voltage tester and touch the black lead and red at the metal. It will light. Turn the power off.
Step 3
Connect the ground wire to the metal box. Put the mounting strap together. Line the canopy’s backside to the crossbar. Fasten it on the pipe. Once the canopy is constructed, the pipe will stick out about 3/8”. Be sure the locknut is secure.
Step 4
Put the light fixture up on the ceiling. You’ll need someone to help hold the light so you can focus on the installation. Depending on the ceiling lamp dimensions, you may be able to do this yourself.
Put the wires to one side.
Connect the crossbar to the ceiling using the screws. Join the neutral wire from the ceiling on the light’s neutral wring. Link the hot wires from the box on the light. Loop the ground wire on the ground screw. The wire’s end should connect to the ground wire.
Step 5
Fold the wiring in the ceiling. Slide the canopy above the box and fasten the nut on the pipe’s end. Turn on the power.
Warnings
Make sure the power is turned off before attempting this task. Never touch exposed wires without using a non-contact volt tester. If the tester indicates there is a problem with the wiring, contact a qualified electrician.
The instructions provided are a general guide. Your ceiling lamp
dimensions and specs may necessitate other steps.
